|
|
Docs | Gallery | Download | Blog |
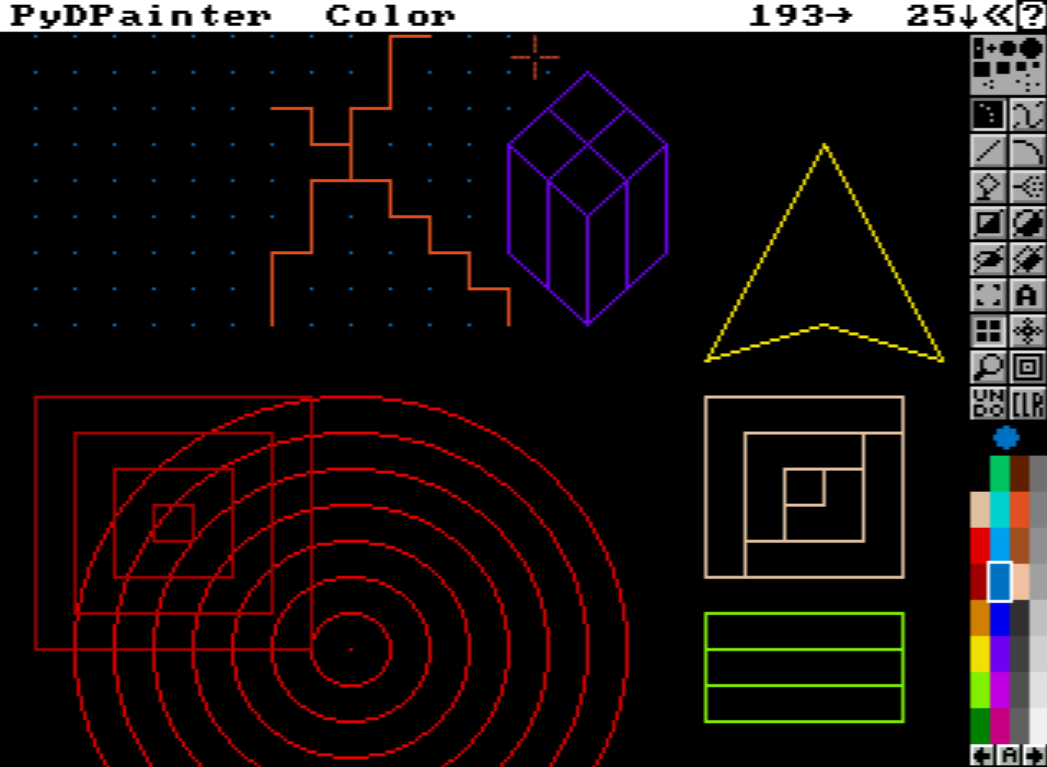
Welcome to the heart of PyDPainter and, before it, Deluxe Paint. Long before toolbars became an obvious standard in graphics software, DPaint provided an efficient interface.

A mouse left-click on a tool selects it directly. A right-click brings up the tool's options. Finally, the tool itself can be halved diagonally, providing a variant - usually the same shape, but filled in.


These options are backed up by very short keyboard shortcuts (a single letter), the capital letter of which brings up the variant or the options.
Here you can choose a pre-defined brush from ten built-in brushes: four round ones, four square ones, and two made up of a number of separate pixels.
Note that their size can be changed quickly, even while drawing, and without enlarging the pixels.
For example, with the usual brush shortcuts:
+ and - keys to enlarge and reduceH to double the sizeh to halve the sizeUpon startup, PyDPainter will default to a single pixel (a dot) as the
drawing brush. You can quickly return to this by using the . shortcut on the
keyboard.

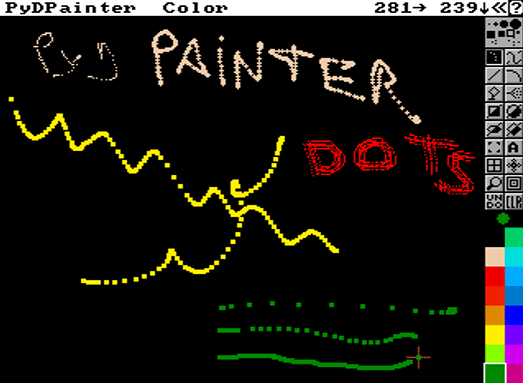
The Dotted Freehand Tool allows fast freehand drawing. Note, however, that the faster you go, the bigger the gaps in your drawing. It can be handy to use and see the shape of a customized brush. Try drawing with it using some of the other brushes to get a feeling for how it works.
 |
|---|
| Speed and brush shape alters the line appearance. |
Holding down the SHIFT key while painting constrains the tool to move either
horizontally or vertically, depending on the direction you move the cursor
immediately after pressing SHIFT.
Key: s
The Continuous Draw tool produces unbroken lines. Don't forget that you can use any brush or your own brushes.
Press the SHIFT key for a horizontal or vertical line constraint.
Note: In the past, real Amiga software would have slowed down with mouse movements that were too fast and brushes that were too large, but with PyDPainter running on modern computers this is no longer the case.
Key: d

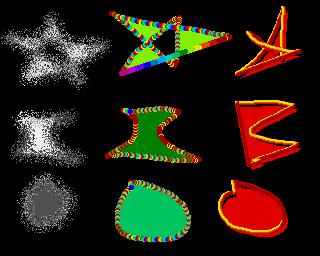
Allows you to draw a freehand area with the mouse, which will then be filled in with the current fill mode. When you release the mouse button, the shape you paint is filled with either the foreground or background color, depending on which mouse button you press when you paint the shape. If you release the mouse button before you close the shape, PyDPainter closes the shape for you with a straight line from your cursor position to where you began the shape.
Current brush is ignored unless you press ALT while clicking on the tool.
Then both tools, drawing and fill, are drawn with the same shape you make on screen, including the possible stroke options (defaults or custom brush, current Mode, spacing options like airbrush, etc.).
Holding down the Alt key as you click on the Filled Freehand Shape tool causes the tool to paint shapes that are filled and then outlined with the current brush using the settings of the Spacing requester. If you use a custom brush as your current brush, it is possible to paint shapes that are filled with one color and outlined with another. The outline is painted by tracing the shape with the current brush. Note that the shape is traced by the brush handle; if the handle is offset from the brush, the outline will be offset from your filled shape.
Key: D
Tip: Drawing a shape that intersects itself creates an interesting effect of unfilled holes. You can fill with background color, drawing with the right button.

Draws straight lines by clicking and dragging the mouse.
First click and hold the button for the origin of the line, then move the mouse
and release the button to draw the line.
Press the SHIFT key for a horizontal or vertical line constraint.
This tool can be used in conjunction with custom Brushes and Modes.
With the CTRL key held down, the tool leaves traces between the two clicks. Warning: This legacy keyboard shortcut can be overridden by the CTRL Pick Override Prefs.
Key: v
Right-click tool or V to open Spacing.

Draws curved lines between two points:
With the CTRL key held down, the tool leaves traces while the curve is being
drawn. Use Shift or the Grid for aligned anchor points.
Key: q
Right-click tool to open Spacing.

Click the icon with the left button, move the cursor (which now looks like a paint can) to an enclosed shape. You can fill the shape with the current fill mode by clicking the left button, and with the current background color by clicking the right button.
Note that the Fill tool fills all the way to the boundaries of an enclosed shape. If the shape is not completely enclosed (that is, if there is a hole in its perimeter), the paint will "leak" through and fill the entire page. Bear in mind that the working format extends beyond the interface menus (press F10 to reveal). Therefore, the fill may spill underneath and produce a surprising result.
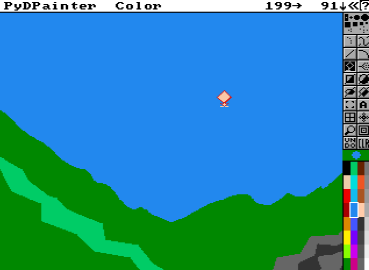
Holding down the Alt key when you click with the Fill cursor, fills outward to the background color. In other words, the fill spreads
outward until it reaches areas of the current background color.
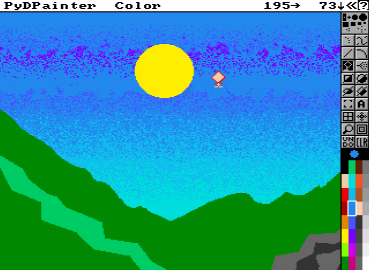
Standard filling is struggling. It stops at the edge of each color of the sky gradient.
Filling the sky with ALT stops only at the background color (green of landscape). Combined with the Stencils function, this is a very effective cleaning tool.
Key: f
Right-click tool or Fto open Fill type.

By using the Airbrush in combination with the different brushes, you can create a variety of effects, ranging from a fine one-pixel spray to a coarse spray made with the big brushes.
Click the Airbrush icon with the left button, and then try painting with it using the various brushes. Try it with the three- and five-pixel brushes, and then try it with the big brushes.
Note that, just like a regular airbrush, if you keep the mouse button pressed without moving the mouse, the paint continues to build up in one spot.
Key: no hotkey
Right-click tool to resize nozzle size.
Press the SHIFT key for a horizontal or vertical line constraint.
Press the CTRL key to slow down the Airbrush flow rate. Warning: This legacy keyboard shortcut can be overridden by the CTRL Pick Override Prefs.
The Rectangle Tool lets you draw squares or rectangles, either unfilled or filled with the current brush or background color.
In any case, the rectangle is completed as soon as you release the button.
Remember, top left for unfilled, and bottom right for filled shapes.
Key: r; R for filled.
Right-click tool to open Spacing or Fill type.
Press the SHIFT key for a square drawing constraint.
Press the CTRL key to draw rectangles on the fly as you move the mouse. Warning: This legacy keyboard shortcut can be overridden by the CTRL Pick Override Prefs.
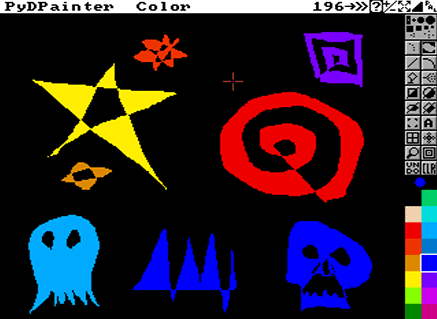
Press and drag with the left button to create a circle with the current draw mode, or with the right mouse button to create a circle bordered or filled with the current background color. Hold down the button and release when you're happy with the shape.
Note: circles are painted from the center outward, so it's easy to put a circle around anything just by starting to paint from where you want the center of the circle.
Key: c; C for filled.
Right-click tool to open Spacing or Fill type.
Press the SHIFT key to start with the next circle center on your last click.
Press the CTRL key to draw circles on the fly as you move the mouse. Warning: This legacy keyboard shortcut can be overridden by the CTRL Pick Override Prefs.
The Ellipse Tool works just like the Circle tool, except that it is still "active" after you release the mouse button. Here's how it works:
Key: e; E for filled.
Right-click tool to open Spacing or Fill type.
With the CTRL key held down, the tool leaves traces while the curve is being drawn. Use Shift or the Grid for aligned anchor points.
Amazing results can be achieved easily:
The Polygon Tool lets you keep drawing straight lines until you have created a closed figure. Here's how it works:
Quickly double-click to stop the shape immediately. In fill mode, the shape is automatically closed by a straight line that joins the first point.
Note: Filled polygonal shapes with intersecting sides create interesting graphic effects.
Key: w; W for filled.
Right-click tool to open Spacing or Fill type.

The brush is a special tool that is an essential part of DeluxePaint's legacy and versatility. With the Brush Selector, anything can be a brush:
Step-by-step operation:
Not just once, like a stamp, but with all the drawing tools: freehand draw, line, rectangle, circle and even ellipse! Experiment with different brush shapes and stroke tools to understand the power and simplicity of the brush tool. Use Brush Trails options for more controls, like Spacing or rotation and resize.
There's a special Brush menu, with dedicated effects and functions.
Try the Matte (F1 - the default), Color (F2), and Repl (F3) modes.
And the best part: there are also Fill Types that use the brush as a pattern! More on that later.

For greater precision, you can click on the brush tool a second time (or press b again) to switch to a polygonal brush tool. It works in the same way as the Polygon tool, but to delimit the area to be captured as a brush. Note that in Replace mode, the stamp remains rectangular.
However, there is one aspect of brush selection you should be aware of: if any parts of your brush consist of the current background color, those parts will be transparent. In other words, whenever you pick up a brush, it's as if you are picking up only the non-background colors; any background colors in the brush will remain invisible even after you change to a new background color. This means that you can create brushes with intricate outlines without fear of picking up a rectangle of the surrounding background color.
Tip: What's more, if you delimit a brush on the screen, but this time by clicking with the right mouse button, this will erase what you've taken as a brush from the screen. This allows you to move blocks of graphics quickly.
Press the SHIFT key during use for for a "square" constraint.
Key: b ; hit again for Polygonal brush.

The Text tool lets you place text anywhere on the page. You can change the color of your text by choosing a different foreground color. To enter text on the page:
The text will "wrap" around to the next line when it reaches the end of
the line, or you can press Return to start a new line directly below the
point where you first placed the cursor. If the page size is larger than the
screen, the screen will scroll to the edge of the page as you type. You can
delete text by using the Backspace key.
Note, however, that if after entering a portion of text you click the cursor elsewhere on the screen, or you select a tool from the Toolbox, that text becomes a bit-mapped image, and no longer behaves as text. In other words, you cannot Backspace over it as you could when it was still active as text. The Brush tool lets you pick it up and reposition it if you didn't have it quite right the first time.
If you right-click on the text tool, you'll access text options, including choosing a font.
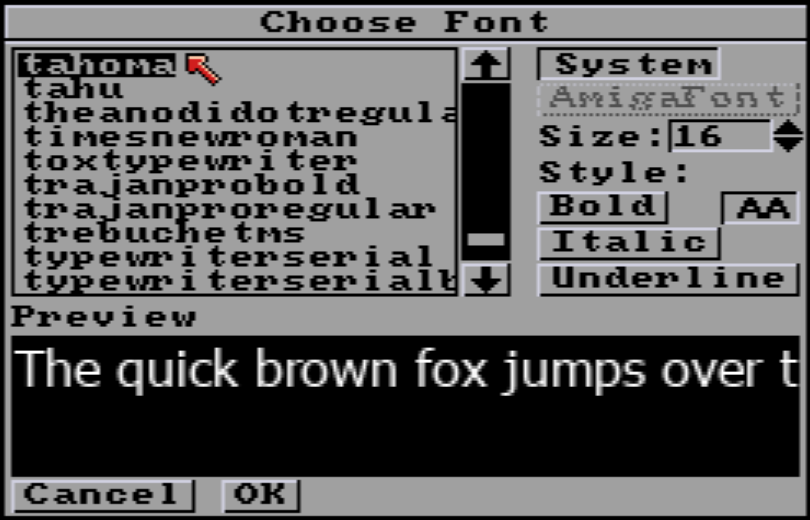
AA is depressed by default, for anti-aliasing. For a more pixelated effect, remove it. Please note that "bitmap" fonts are no longer a common standard, so don't hesitate to install some fonts on your system from these sites:
Note the approximate height, and enter it in the "Size" field. 8 is a good default size for legacy bitmap fonts.
ColorFont and AmigaFont are not yet supported.
Key: t

The Grid constrains the action of all painting tools:
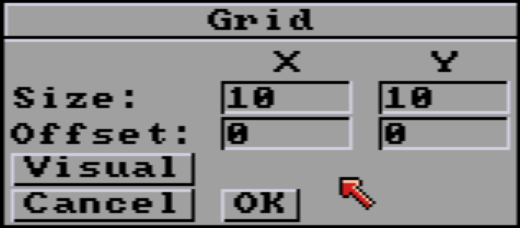 V.2.1.0 added number spinners to increase/decreae value with a mouse click. Keep the mouse button down to change values faster.
Pixel length and height of the grid. This means that, for example, a line or a drawing can only be drawn at the same pixel spacing. If you're creating tiles for a video game, this size will be the size of your tiles (e.g. 16x16 px). This allows you to create a reference grid. Desactivate the grid tool as you draw (same icon).
Offset from origin (0,0) at top right of work screen.
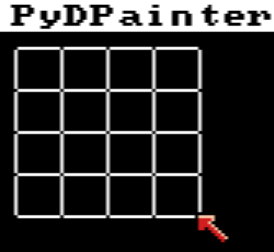
Show a visual grid on the screen which you can resize and position with the mouse to set the grid parameters.
This takes the current brush size and copies it to the grid size. It's very convenient to test the placement of your tiles (grabbed with Brush) side by side effortlessly. Maybe use Handle Corner multiple times to handle the brush by the most convenient corner.
The grid can help you quickly draw geometric shapes, spritesheets templates, regular shapes and dot grids. Experiment with different tools, in conjunction with the SHIFT and CTRL keys!
Key: g

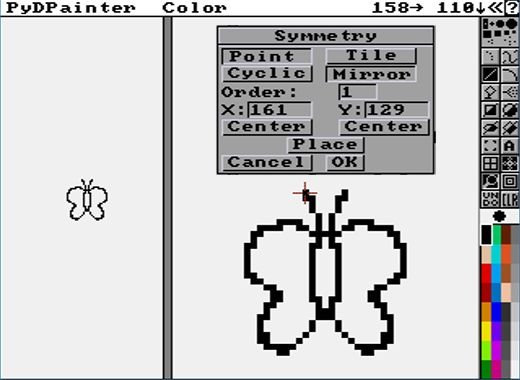
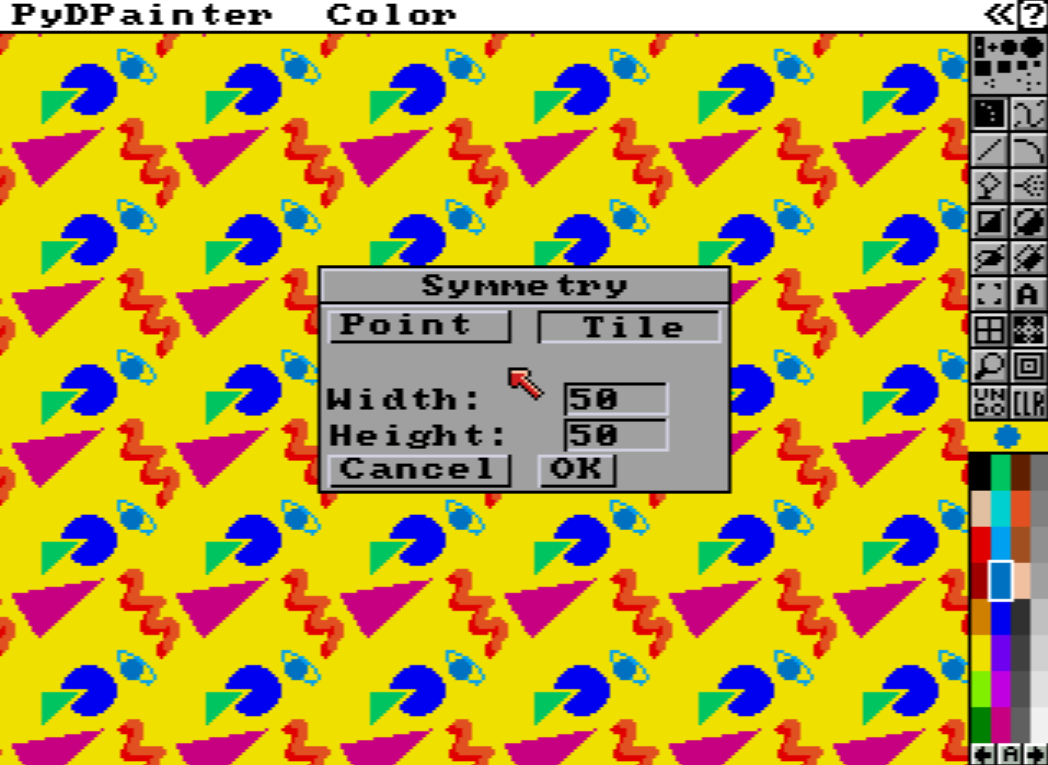
The Symmetry tool helps you paint symmetrical patterns around a central point or based on a tiling scheme. Symmetry works with all tools except Text and Brush Selector.
There are two symmetry modes : Point and Tile. Click the symmetry tool with the right mouse button to set parameters for each of the mode.
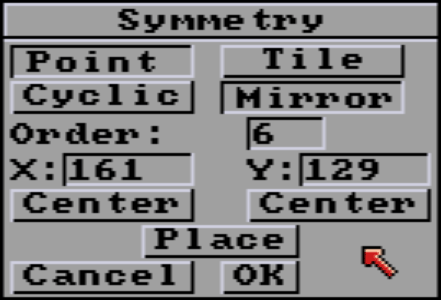
Point Symmetry works around a central symmetry point in either Mirror (mirror image duplication of each point) or Cyclic (direct duplication at each symmetry point).
Note: the default Mirror, Order 6 settings is not the most useful, which can lead to the false impression that symmetry is just a way of plastering the screen all willy-nilly.
You can lower the Order value to 1 with Mirror on to retain a basic mirror function. The left and right parts of the screen will be copied as a mirror erected vertically in the center of the screen.
An Order of 2 imitates a paper folded into 4, like the Rorschach tests.
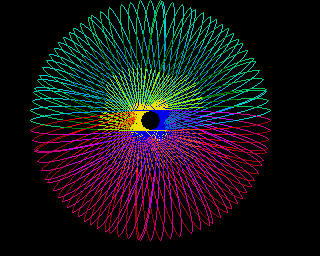
Cyclic symmetries of order 2 to 7, especially the odd values, once offset from the center of the screen, let you effortlessly draw bold natural shapes, such as flowers, an impact on the ground, the cracks in a window, a tunnel narrowing...
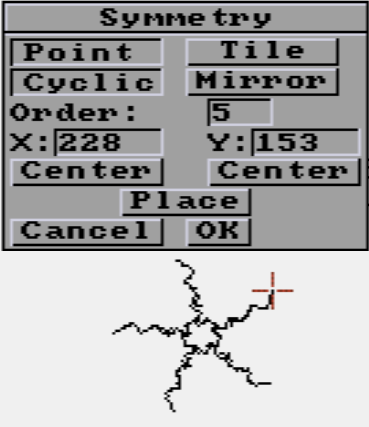
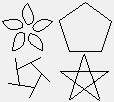
Values of 5 and above, used with the Line or Curve tool and a little practice, will help you draw regular polygons, stars, helix, screw…
The maximum is 99, which may sound crazy, but allows for some very amusing variations on the circle design.
The X and Y values allow you to manually enter the origin of symmetry. Note that an origin of 0 may render the tool invisible (it draws outside the screen).
The two Center buttons automatically calculate the correct value to center the symmetry point, depending on the size of your page/work screen (that of PyDPainter).
To reposition the central point of your symmetrical pattern:
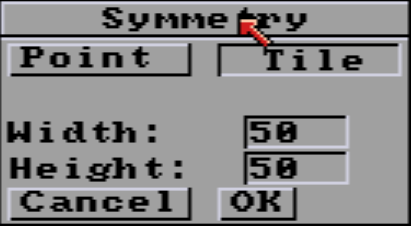
Use Tile Symmetry to create 'tile' patterns. You can set the horizontal and vertical dimensions (in pixels) of the tile size. Tile is useful in creating fill patterns; once you've created your symmetrical pattern, set the Grid to the same spacing as the tiles to pick up exactly one tile as a brush.
Tip: use Tiles in the spare screen (j) instead, as it fills up the screen very quickly.
 |
|---|
| Yeah, easy 90s pop Memphis style wallpaper, baby! |
Key: /

This tool divides the screen into two parts and displays the right-hand side in magnification. This tool is especially useful for detail work. When you are in Magnify mode, you can use any other tool on either side of the screen.
To move the magnified area around the canvas, use the arrow keys or the n key
to center the magnified area over the mouse pointer. You can also use the
middle mouse button to drag the magnified area around.
Key: m

Changes the scale in Magnifier Mode. Click the Zoom tool with the left mouse button to enlarge the image and click with the right button to shrink the image. Or use the scroll wheel on a modern mouse.
Keys: > / <

Reverses the last painting action. Thanks to the huge memory capacity of modern computers, PyDPainter allows up to 20 undos!
Right-clicking or uppecase U "undoes" previous undos.
Keys: u / U

Clears the screen to the currently selected background color. If you have multiple frames, an Options requester appears for you to indicate which frames you want to clear.
Key: K <= uppercase
You see a zone below the Undo and CLR button and above the color palette : a rectange with a large dot in the center. The dot is always displaying the Foreground color. The rectangle is always of the color of the Background color.
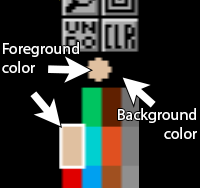
The foreground color is the color used for all drawing tools with the LEFT mouse button... like lines, shapes, text in default Color mode, etc. It's the default fill color for the Fill tool too, if no other Fill Type have been selected. The color palette belows, have the foreground color, cream by default, displayed inside a white outline.
By default, on a new PydPainter projet, the Background color is black. All drawing tools can use this color to ERASE or as a secondary color using the RIGHT mouse button. The Fill tool can always fill with that color too, whatever Fill type is on. Just RIGHT-click with Fill tool selected.
Clear tool use the current background color as its color to clear the current screen.
That means the Brush tool use this black as transparency by default. It's not mandatory, you can SELECT another color RIGHT clicking anywhere on the palette below. Pink can be the transparency color, preserving all black pixel to be transparent in a new brush grabbing.
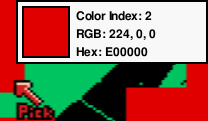
You can pick any color from the canvas using a left click on the Color Swatch (either the dot or the are around it). While using a drawing tool, you'd better learn this short key: ,. There is also the optional short-key Ctrl to pick a color everywhere for the convenience of PhotoShop and tablets users. Activate CTRL Pick Override in Prefs menu to use it.
The mouse pointer changes to a pipette with a information bubble displaying the current color index and RGB values.
Note: This does not modify the color palette - it only chooses which color from the palette you paint with. If you need to modify a color in the palette, use Palette (below).
You have quick access to Palette editor, using either of the methods below:
PThe colors are numbered from 0 to the max colors you define in the Choose Screen Format requester. A LEFT click on any color select the color as Foreground. A RIGHT click select color as Background. The bubble can display additional information, like index and RGB values.
32 colors slots are displayed at a time. If you're using more, use the arrows bellow to browse through more colors (from A to H if 256 colors.)
