|
|
Docs | Gallery | Download | Blog |
 |
|---|
| These options make more sense with a custom brush, otherwise it just looks like dotted lines. |
Number spinners: Click the up or down arrows to increment or decrement values. Holding the button causes them to repeat.
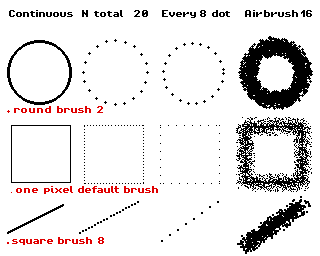
Default operation. Brush paints continuously without spacing.
Defines the regular pixel spacing between each time the current brush will be copied along the path. This spacing remains the same whatever the length of the line, the size of the rectangle and so on.
Note: The default spacing of 8 pixels can be covered by brushes larger than 8 pixels.
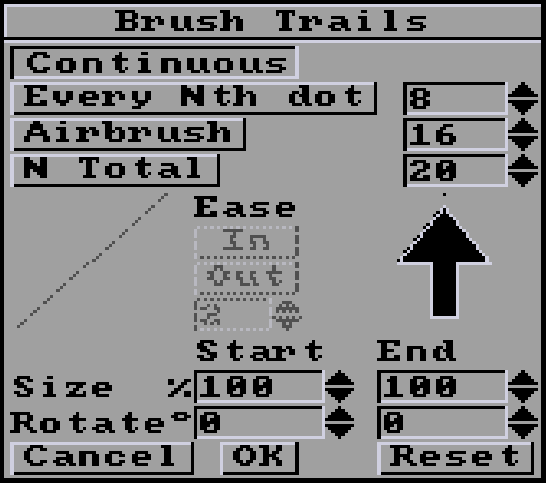
Airbrush paints using the airbrush tool along the path defined by any drawing tool affected by thoses settings (Line, Curve, Rectangle, Circle, Elipse, and Draw). The number '16' by default sets the number of airbrush sprays to be applied at each pixel along the path. We recommend lowering it to 1 to 4 to better understand the effect. This creates a fuzzy line or shape. The spraying size defined by a right-click on the regular Airbrush tool is supported.
Note: The Airbrush settings apply to all the drawing tools, not the Airbrush tool. Use the Draw drawing tool for a free drawing.
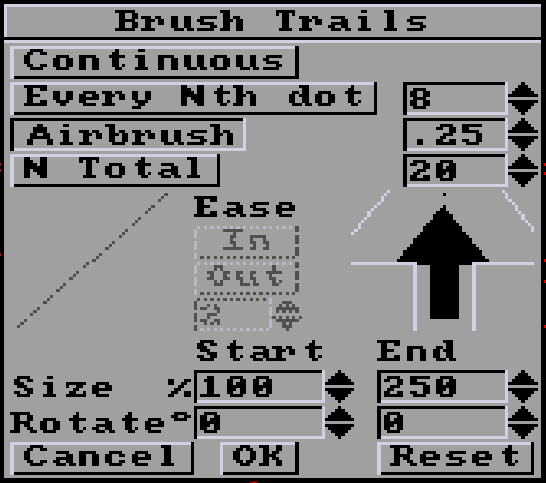
Airbrush values between 0 and 1 are now accepted. The first aim is to be able to reduce the spray flow sufficiently to use the new Anim Brush function. But it can be useful with normal brushes too.
Use the number spinners to decrement value to 1. Starting at 1, each click down will halve the value (0.5,0.25,0.12...). Each up-click doubles the value up to 1. Beyond 1, the 1-by-1 incrementing behavior returns.
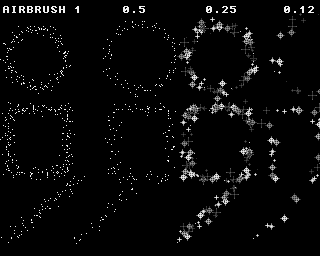
In the picture above on the right side, you see two examples of the "sparking-star" animbrush with Airbrush values of 0.25 and 0.12 using the circle, rectangle and line tools. On the left side, there are two examples with the default single pixel brush, at 1 then 0.5. You'll notice that this greatly reduces throughput.
You can set the new Size and Rotation parameters to quickly add variety, for example: Set Size end to 250% will spray your brush up to 2.5 times larger. Set Rotation from -90° to 90° will create an illusion of chaos with a brush that has a directional sense, like a square, a rock.
Defines the total number of times the current brush will be copied along the path. For example, if you draw a circle with a total spacing of 14 with a star-shaped brush, this will make a round of 14 stars.
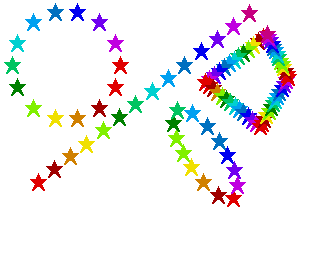 |
|---|
| Combined with the Cycle mode using a color range, gives this kind of effect. |
Note: With shapes that have multiple line segments like rectangles and polygons, the N Total property is applied to each line segment.
From left to right, examples of the 4 default settings, with Circle, Rectangle and Line tools, each with a different brush (indicated in red).
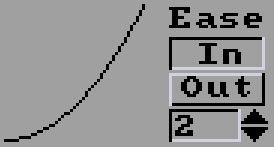
These settings allow you to apply acceleration or deceleration effects to a brush either by drawing on a static canvas or by animpainting across multiple frames in an animation.
Note: The Ease In and Out settings are enabled only when the N Total option is selected.
The graph to the left of the settings allows you visualize the affect on the brush trails. Think of time as going from left to right and position going from bottom to top. A line will show linear trails while a curve will show acceleration or deceleration.
The settings control the spacing of the brush trails:
| Ease In | Ease Out | Example (left to right) |
Description |
|---|---|---|---|
| Off | Off |  |
brushes are evenly spaced |
| On | Off |  |
brushes start with narrow spacing and gradually get wider |
| Off | On | 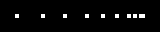 |
brushes start with wide spacing and gradually get narrower |
| On | On | 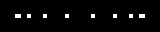 |
brushes start with narrow spacing and gradually get wider until halfway when they gradually get narrower again |
The number below the Ease In and Ease Out buttons controls how quickly the spacing or decreases. It's actually the exponent for the curve, so by adjusting it you can make the curve steeper or more gradual.
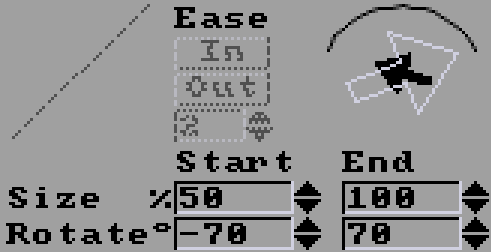
The Size and Rotate settings apply changes to the current brush while painting or animpainting. They can be used to apply pseudo-3D transformations to text or other images.
The Size and Rotate settings each have a Start and End parameter and a visualization using arrows and an arc. The solid dark arrow represents the start size and rotation, and the outline light arrow represents the end size and rotation. The arc around the outside shows the path of the rotation.
The Size Start parameter (50% in the above screenshot) is the percentage size of the brush at the start of a brush trail, and Size End (100% in the above screenshot) is the percentage size of the brush at the end of the brush trail. In the same way, the Rotate Start parameter (-70 degrees in the above screenshot) is the rotation of the brush at the start of the brush trail, and Rotate End (70 degrees in the above screenshot) is the rotation of the brush at the end of the brush trail.
If you take this brush:

and draw a line from left to right with 10 trails (N Total = 10) and the Size/Rotate parameters from above, you get this:

Notice that the brush trails get larger from left to right as they rotate from -70 degrees to 70 degrees.
Using animpainting and Brush Trails you can even make this effect:
See the move tutorial to learn how to create things like this yourself.