|
|
Docs | Gallery | Download | Blog |
The Mode menu contains options for different brush modes.
Note: With the exception of Shade Mode, the right mouse button always paints using current background color (black by default) in Color Mode. So use the left button with these Modes.
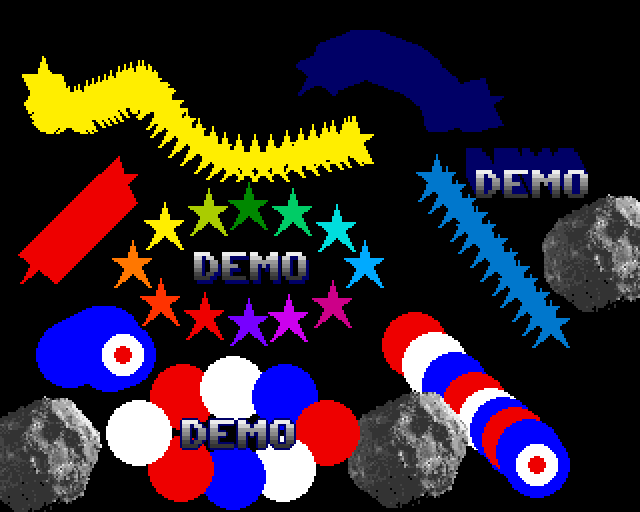
To help you visualize the action of all these modes, we've used all or part of this image in our graphic examples:

For examples, we use the first column (star, target, text, asteroid) as custom brushes.
Uses a custom brush in its original form. Those areas of the brush matching the background color in effect when the brush was first created are transparent. note: black by default. This is the default mode activated when you create a custom brush using the Brush Selector. Now you can draw using this brush in all drawing tools.

Try to explore all drawing tool parameters for interesting effects.
Key: F1
Keeps the shape of the brush, but fills it with the current foreground color. Those areas of the brush matching the background color in effect when the brush was created remain transparent. All brush colors are replaced by the selected foreground color.
Use this mode as a monochrome ink pad, allowing you to create shadow effects, offset outlines or color stacking.
Key: F2
Uses the brush in its original form (i.e., Matte, see above), except that no
colors are transparent.

Key: F3
You can smear any colors on the page by dragging a brush over them. This is like smearing a wet watercolor with your fingers, so the bigger the brush, the more pronounced the effect. Smear uses only the colors under the brush, and does not add any new colors. Current brush color is irrelevant, but shape is.

Try this with differents shapes and tool to disintegrate, burst, add noise to an overly picture-perfect sketch.
Key: F4
To understand the following modes, you need to consider the default 32 color palette. The default palette has two built-in Cycle Ranges: a grayscale range (1) and some rainbow red-green (2) you've seen in most DPaint tutos. Please note that the rainbow range in the examples can be expanded to encompass more colors than the default range, and that no colors are shared between the two ranges. These ranges are used in all gradient fill options, Shade, Blend and Cycle Mode.

Use Picture/Change Color/Palette menu or hit p to check, edit or create
Cycle Ranges. Click on 1 to 6 Range buttons to check if any
preexisting Cycle Range. To define a new Cycle Range: Select a number,
select first color, click on Range, then choose your last color.
You can create subtle shading effects on those colors in your picture that are in a cycle range. Like Smear (above), Shade ignores the current brush color but uses its shape. By dragging the brush over those colors in your picture that are in a currently selected cycle range, you can paint over each color with the next color in the range. You can paint with the next-higher color by using the left mouse button, and the next-lower color by using the right mouse button. "Higher" and "lower" are relative to the color under the brush at the time. If the current foreground color is in a cycle range, Shade has no effect on colors outside that range. If the current foreground color is not in a cycle range, Shade treats the entire palette as a cycle range. (A range is selected if one of its members is selected as the foreground color. A color that is a member of two ranges selects the first of those two ranges.)

This mode lets you create visual effects such as false colors, superimposed shapes and bevels to highlight a shape.
Key: F5
Like Smear, above, Blend affects the colors under the brush by running them together. Unlike Smear, however, Blend uses additional shades by averaging the blended colors, whereas Smear uses only the colors under the brush. Thus, when you Blend two shades by painting over them, you are selecting a third shade from the palette, the closest one the program can find to the average of the two original shades. If you select a foreground color outside of a cycle range, Blend treats the entire palette as a cycle range. If you select a color within a cycle range, Blend only affects those colors on the screen that are within that range.

Depending on the brush used, the color underneath, the color cycle selected or not, and the direction of your movement, results can vary greatly.
Key: F6
Uses the current brush shape and cycles through all the colors in the currently selected range as you draw. A cycle range is selected if one of its members is selected. If a color is a member of two ranges, selecting it selects the first of those two ranges. If your current brush color is not within a cycle range, it paints with that color only.
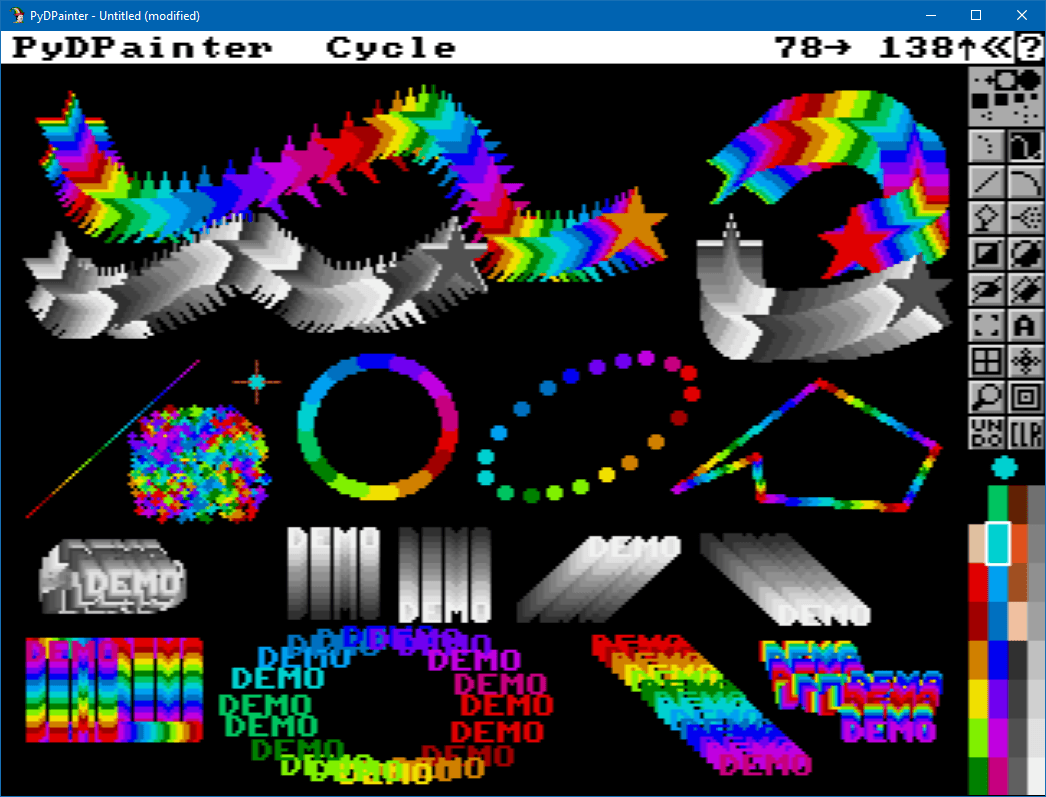
This mode is one of the most creative tools in software such as PyDPainter/DPaint.This kind of easy-to-use effect is not found in modern tools.
Hit TAB to cycle colors (Another very retro effect).
Key: F7
Reduces the contrast between two adjoining areas. PyDPainter finds colors in the palette between the two bordering colors and paints the boundary in intermediate shades. Smooth looks at the current palette and finds the colors closest to the ones under the brush. Thus if the palette contains a wide selection of colors close to the ones under the brush (e.g., the selection of greys in the default palette), it will have more colors to choose from to create its weighted averages. Useful for smoothing out contrasting boundaries, or for eliminating jagged edges.
Smooth mode.
Note: This mode is now available in PyDPainter in all Fill tools too. In
addition, we've added a new, more accurate smoothing mode, AntiAliasing,
only available in Fill tools. To use them, select the Smooth or
Antialiasing buttons in any fill tool parameters (right-click on the
bottom-right half icon of any drawing/filling icon) and fill an area of your
picture.
AntiAliasing fill samples. Less blury, more accurate for aliasing.
Key: F8
Uses the hue of the selected foreground color to "tint" the colors below as you are drawing. Replaces the hue and saturation of the affected pixels with the current color but leaves the value of the screen pixels unaffected. Note: Works best with 256 colors or with a palette designed for this purpose. Do not try on black background.
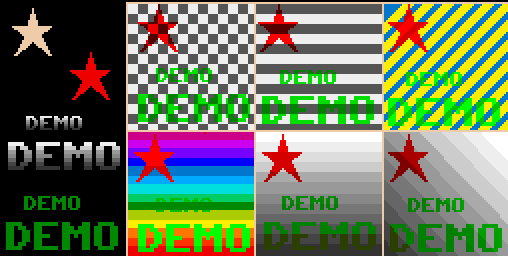
Tint examples, using a star brush with red foreground color and DEMO brush in green foreground color. Only the shape of the brush is used. The brush's original colors are ignored.
Key: F9
not implemented yet
Extra Half-Brite (EHB) was a graphics mode on the Commodore Amiga computer. It uses six bit planes, i.e. 6 bits per pixel, where the first five bits represent the index of a color in a 32-color palette (25). The sixth bit indicates that the color is that of the palette indicated by the first five bits, but with light intensity halved. The title screen of the game "Full contact" by Team 17 used this mode, as did the "HalfBrite Hill" by Kevin Sullivan's demo
When you are in HBrite mode, painting with the left mouse button darkens colors on your painting to their halfbrite equivalent; painting with the right button lightens colors that are halfbrite. This mode is especially useful to animate pictures with shadow or highlight effects.