|
|
Docs | Gallery | Download | Blog |
These new settings are hidden in the formerly Spacing options. They have two uses:
If you're familiar with Deluxe Paint III's "Move Requester", it's close. Rather than reproduce it, PyDPainter has opted for a different approach.
This tutorial is designed to get you up and running quickly. However, keeping with PyDPainter's and DPaint's original philosophy, remember that parameters and options can be combined quickly (sometimes with the touch of a key), and that the potential of this lies in experimentation, not in ticking off premade options.
If you're a complete beginner, first familiarize yourself with the toolbox icons. Help bubbles can be activated using the expandable mini icons bar (top right of the screen).


 with a left-click selection rectangle. Try to catch all the text without cutting it off, as close as possible to the pixels, to obtain a brush size as close as possible to the text.
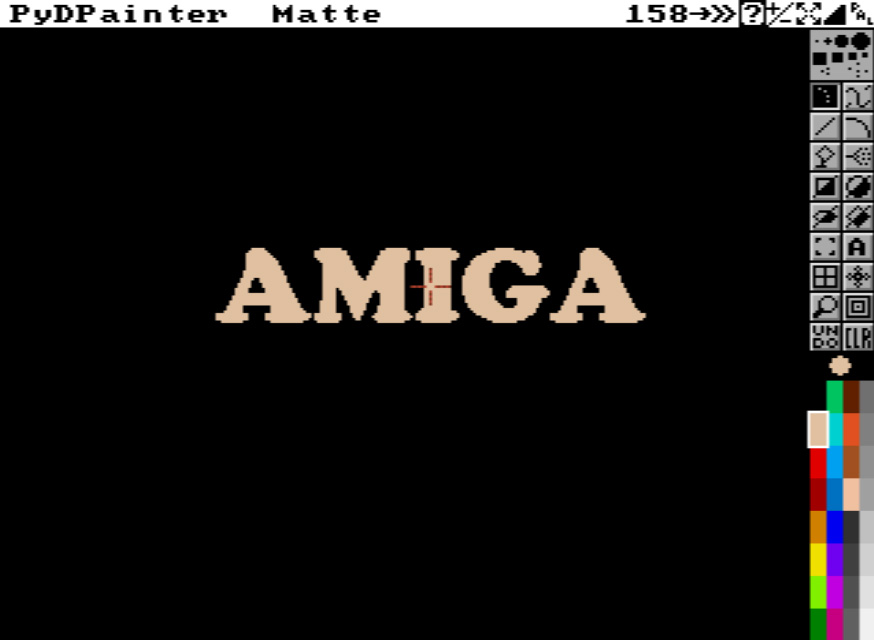
At this point you should have the Amiga text following your cursor, and you can draw with it. Multiple Undo and repeat the steps if it doesn't work. Use CLR to clear the screen when done.
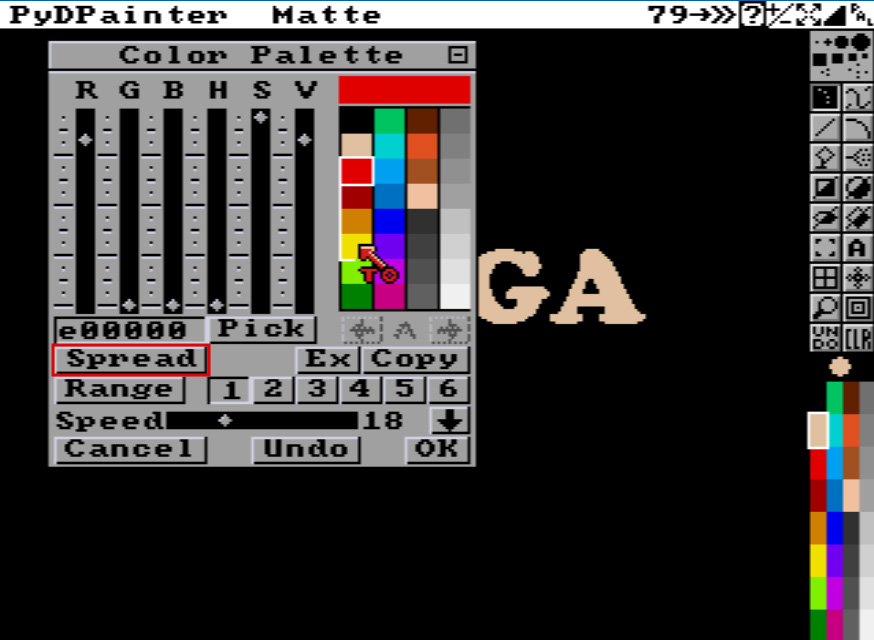
F7). Select the yellow, 5th in the color Selector. If you paint left-clicking this, it will produce your text with orange, yellow or green colors. If not, make sure in Prefs, the MultiCycle option is unchecked. Hit F7 again.Open Palette with p key.
Click on the first red color. Then click the Spread button. Your mouse cursor is now "To". Click on the yellow to generate a nice orange gradient beetween theses two colors. See bellow.
We need to expand the Range to use all thoses colors in a nice rainbow.
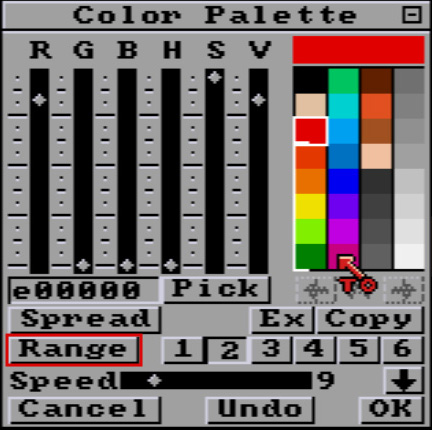
We got this lovely rainbow with a Range 2 that includes it (the white bracket next to the colors) as shown in the following image.
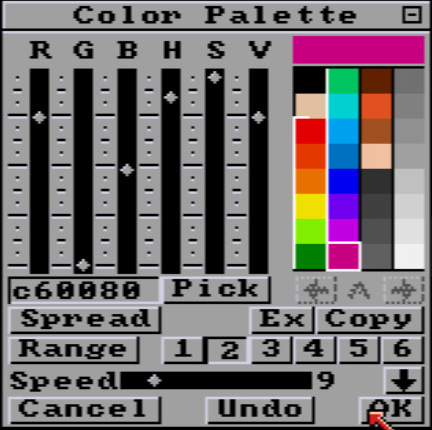
That's it, click OK to close the palette. It may have been a bit boring for the experienced, but it's going to be very cool. Let's get to work on those new Move settings!
Its parameters can be used with any drawing tool. Even in continuous Draw. But it can get chaotic fast. Just so you understand, we're going to make simple straight lines, and lines using a defined number of brush strokes along its length.
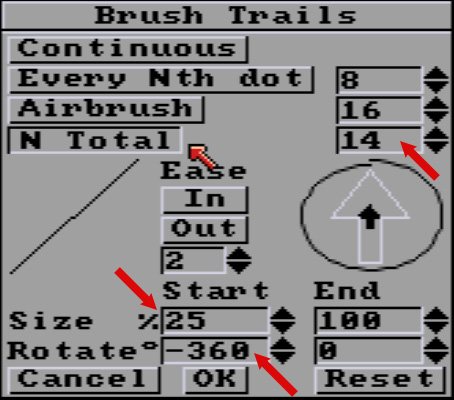
So let's press the N Total button. Default is 20 steps. First, let's try to match this setting to the exact number of colors in our new Color Cycle Range. If we check the rainbow in the color selector, we count 14 colors.
Enter 14 in the N Total field. Watch for the red arrows bellow to help you locate the settings.
Let's start with a double effect for our current brush:
B to restore last Brush if not.F7).Each line has 14 steps of your brush, rotating completely around 360°, from a 25% size to it's full size and final orientation. Those steps paint through the 14 colors range of rainbow colors we defined earlier, thanks to Cycle Mode, starting with the red and ending with the pink. The superimposing of colors helps you understand the order in which things are drawn, from the beginning of your line to the end. If you don't like the color order, you can reverse it in the Palette with the big up/down arrow above the OK button.
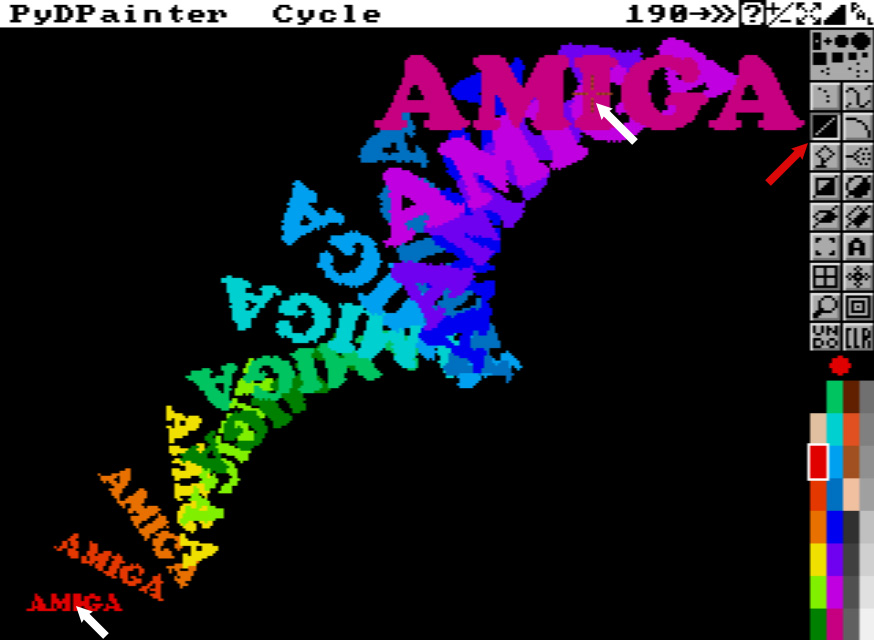
Drawn with a line from left bottom to top right.
Now you can clear the screen with the CLR icon and try out other drawing tools, such as the Circle.
See also how the brush handling point (the orange dotted crosshair you have in the middle of your brush) can affect the way things are rotated. Try the four different Brush / Handle / Corner (in the Brush menus or hit alt x) while drawing to understand the idea.
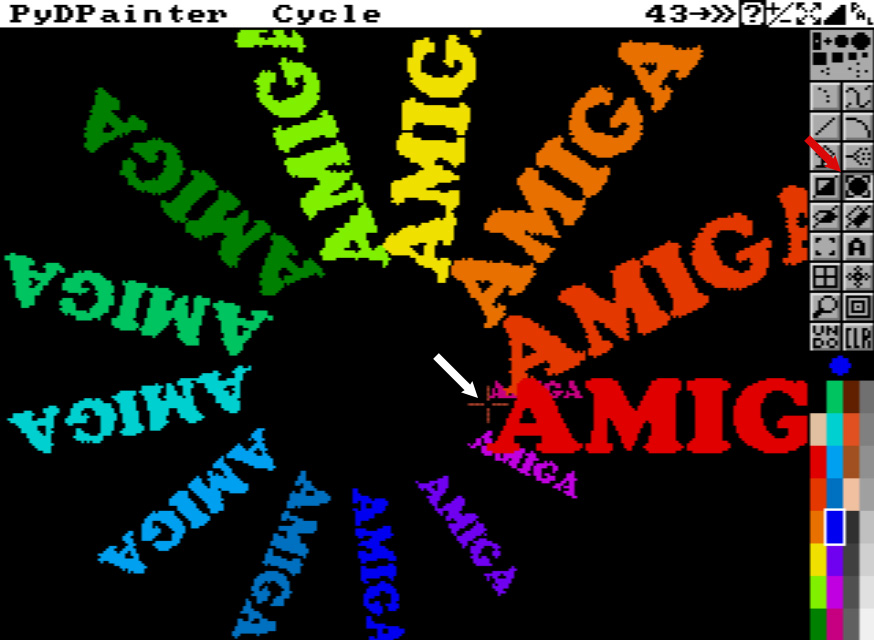
A Circle with the same brush, but handled from the left, make the Text rotate around it's beginning letter A.
Let's end with an easy animation.
Go to Anim / Frames / Set #...sub menu.
Set Frame Count to 14 (It's easier to have the same numbers of steps as set in N total Brush Trails settings) and hit OK. You're now in the first frame of your 14 frames Animation. Check the navbar below the screen to control animation.
Select the Line Tool. You can use Cycle mode or not as you like.
Go tho the upper left of the screen.
Hold the Animpainting key down. It's Left-Windows on PC, Left-Command on Apple and Linux.
Click and hold once, move the mouse to the opposite right bottom corner, so we see the entire text at the end. Release your mouse button when happy with the preview.
Release the Animpainting key. On some PC, the Windows start menu may pop up and annoy you. Cancel it (ESC) and go back to PyDPainter.
Hit Play icon or Space key and enjoy the animation you create ! Hit ESC to end replay.
Save as Animated GIF to share it. Go to Anim / Save... menu, enter a filename and choose Animated GIF.
If you want to restart, Clear All Frames, Go to frame 1 and start again. Undo will not works across multiple frames. Now you can stack several animation, try new Move parameters, start with another color of the cycle, try your own brushes...
In this another tutorial, we'll show you more how you animate using Animpainting.