|
|
Docs | Gallery | Download | Blog |
Let's take a look at the new Anim Brush tools.
The anim brush concept, although it dates back to Deluxe Paint 3, is still quite original. The idea is that, just as any portion of the screen can be grabbed like a pencil to draw with (a brush), so too can any part of an animation.
The applications for animated brushes are numerous, and like many of the possibilities offered by the pioneering tools of this era, it's almost up to you to invent the uses.
Since PyDPainter isn't just a DP3 remake looking back to the past, we've created a number of new features:
Enough talk, let's learn how to make this text sparkle with dozens of stars!

This tutorial uses files provided in the iff_pics/ folder of the PyDPainter software distribution. Open the animbrushes-ex.iff picture file (Use Picture/Open menu).
On this picture, you'll see various examples. These are the stages of a small animation, but arranged side by side horizontally. We'll use the series of 12 images of a star that lights up and goes out.
We're going to "catch" this and turn it into 12 frames for this little animation  .
.
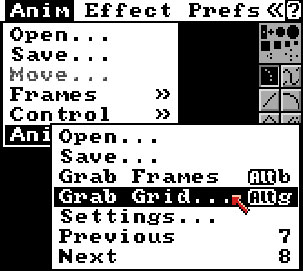
To do this, we'll use the Grab Grid function in the Anim/Anim Brush/Grab Grid... menu or with the Alt-g shortcut.
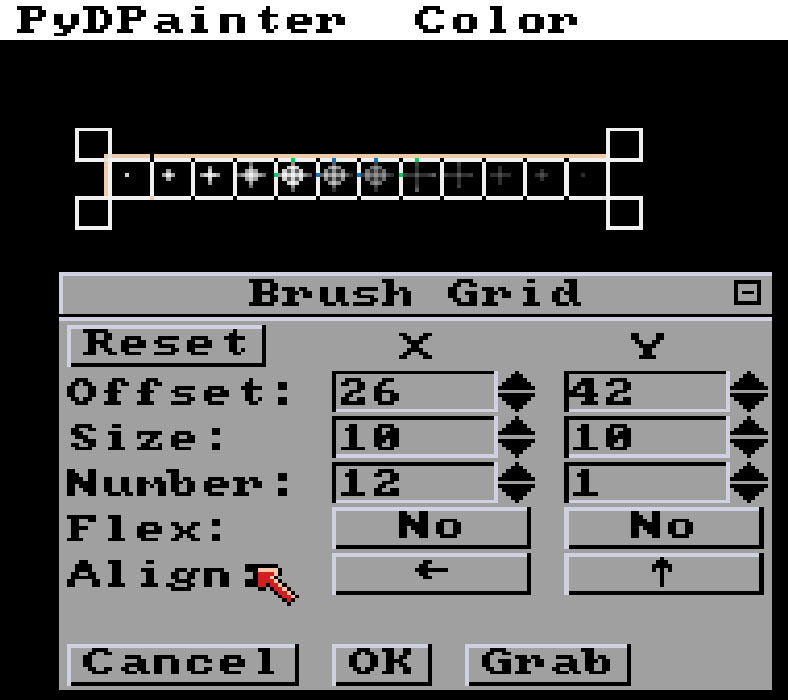
This opens the Brush Grid requestor, where you can enter values with keyboard or number spinners or use the visual assistant in the form of a white grid adjustable with the mouse.
 \
Tip: you can move the requestor if it obscures the area you need to work on. Inside the title bar, a new [-] button lets you collapse it.
\
Tip: you can move the requestor if it obscures the area you need to work on. Inside the title bar, a new [-] button lets you collapse it.
First, let's count the number of sprites you have to grab: from the single white dot to the last single gray dot, via the twinkling star. We've got 12 animation steps - if you look closely, the last one is very dark. Enter 12 in Number X. Leave 1 in Number Y because this tool can also grab graphics in multiple rows and columns.
Move the visual grid with the mouse:
Move the grid so that the top left corner is one pixel below the reference line I've deliberately left at the margin of the first star point.
If you don't get it right, you can enter the values shown in the example:
| X | Y | |
|---|---|---|
| Offset: | 26 | 42 |
| Size: | 10 | 10 |
Note that you can click on the arrows of the number spinners to adjust values quickly, while taking a look at the visual grid to see what it does.
The OK button validates your settings and saves them. This means you won't lose your precious adjustments if you realize you need to change the background color or adjust a pixel. Cancel will cancel your last changes. At the top, the Reset button resets all values to default. Useful if you've played with it too much.
When you are done, click Grab.
You have the impression that nothing much has happened. However, look at your mouse pointer, it's on a white dot. This is in fact the first frame of the Anim Brush.
_Note: If you fail to capture the animated star at this stage, you can continue this tutorial by loading my pre-made anim brush. I've prepared it for you in the folder iff_pics/sparkling-star.gif. Load it from the Menu_ Anim / Anim Brush / Open....
Let's play with it, even on a still image, it can be useful. Hit j to switch to spare screen.
Use the Dot tool  to doodle. With each left click, you'll notice that you've left a star at the next animation stage. For the time being, the sequence is always the same: going forward. Let's change that.
Go to Anim/Anim Brush/Settings...
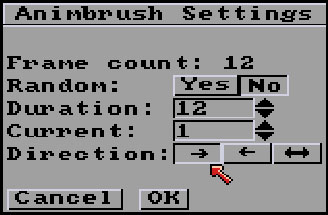
In the Animbrush Settings windows, you can try to change the Direction of the sequence: normal, backward and even "go and go back in reverse". Click those arrows, then OK and try to doodle.
Go to Animbrush Settings again, and click on Random: Yes button.
Now, each time it is called upon, PyDPainter will randomly draw one of the star's states from the 12 anim brush frames. This gives an impression of randomness that you can use with all drawing tools and its spacing parameters (e.g. with Line, N Total: 12).
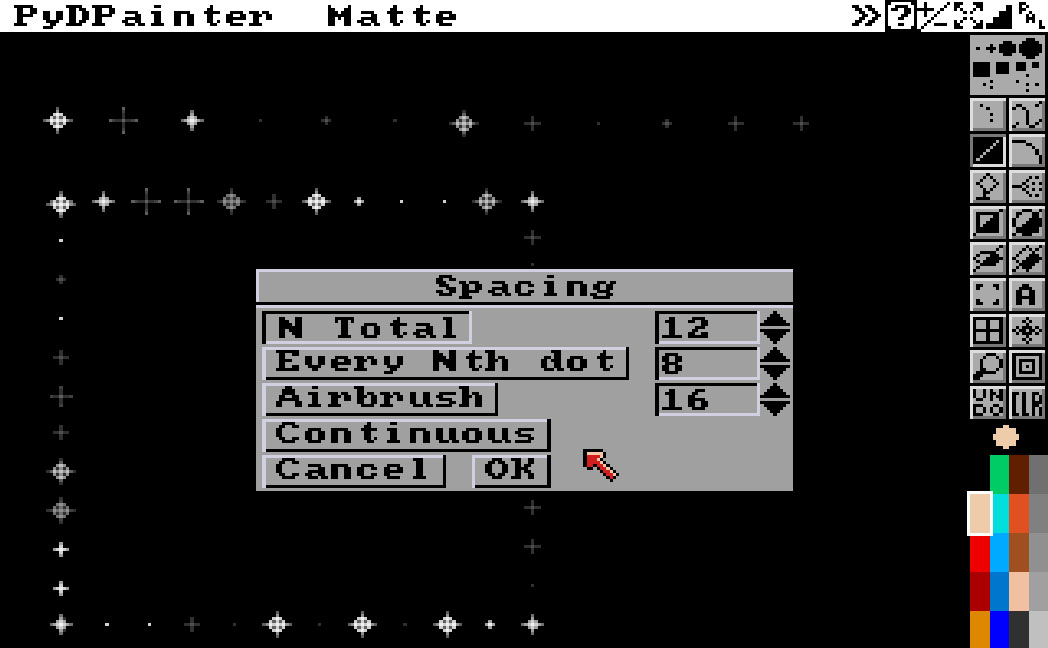
Try it with the airbrush too. Now you can fill the screen with random stars in the blink of an eye!
Note: If you know how to create a quick logo your way, skip this part.
Hit CLR icon to clear your screen. In the text tool parameter (right-click Text tool), choose a large bold font with width like 36-42. Type some text on screen with one of those grey colors. Fill it with the preset gradient of grey (make sure a grey color is selected). Use Fill Settings with those options:
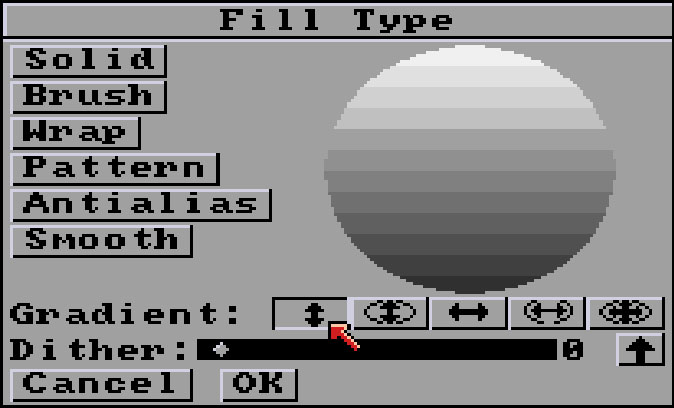
Vertical Gradient. Dither almost to left at 0 (no noise, no pattern).
Note the new arrow, which, with one click, changes the direction of the gradient in reference to the "range" defined in the Palette.
![]()
Once you're happy with your logo, we're going to make it sparkle with a thousand stars.
We need to recapture or recall the star anim brush. In fact, if you've used or defined another brush at some point, your anim brush is gone. Try one of theses:
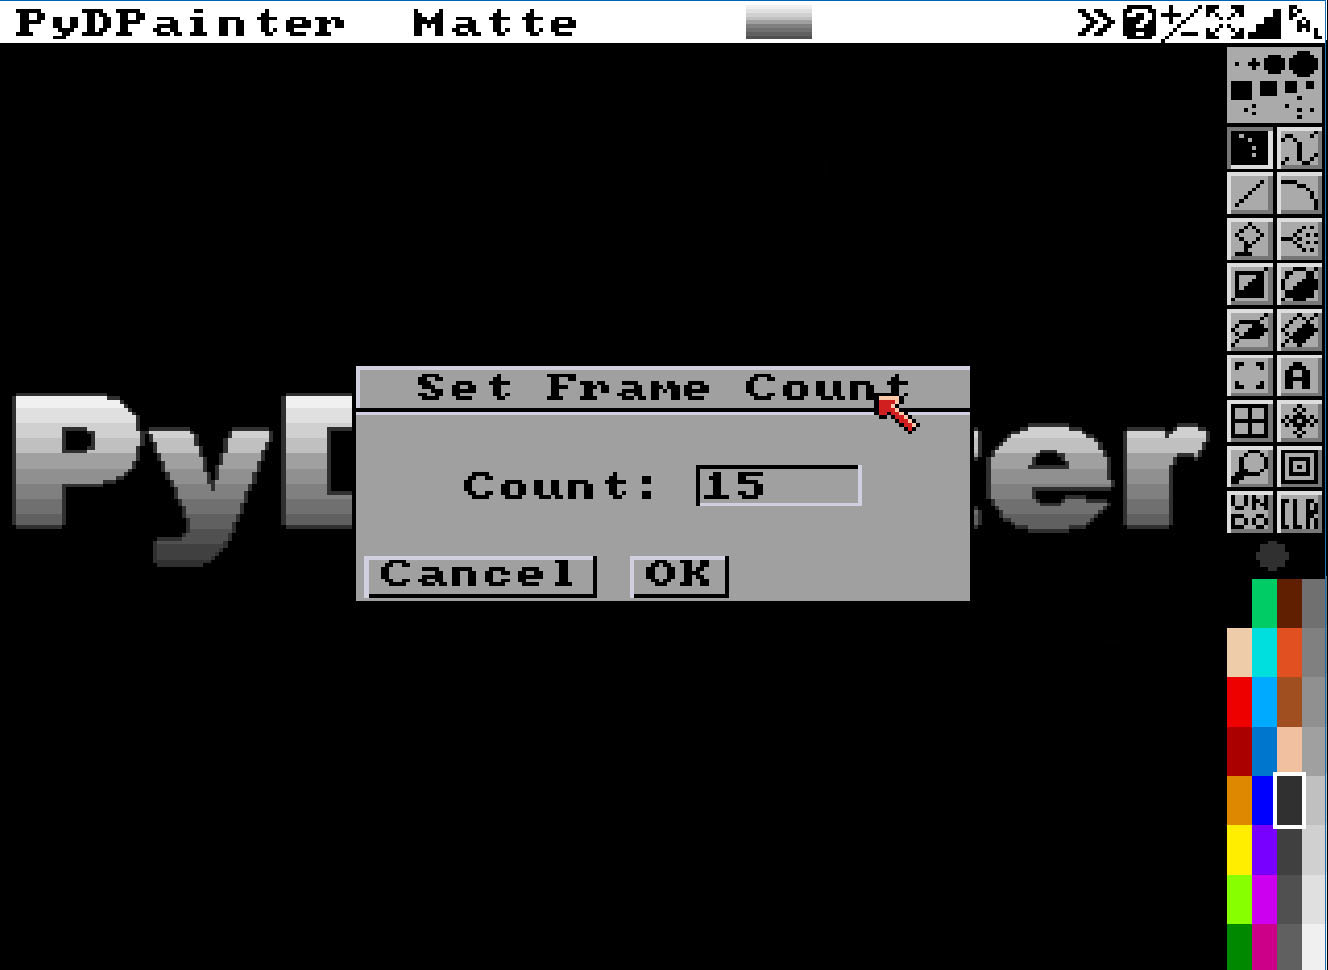
Shift-B anyway to recall it.j).iff_pics/sparkling-star.gifThis time, we're going to do an animation. Remember that, by default, PyDPainter duplicates the current image when you ask it to create several frames. This suits us, because we want to start with this logo everywhere. Go to menu Anim / Frames Set. Enter 15. It creates a 15-frame animation with your logo in it.
Check in Animbrush Settings menu that you are starting from the first animation frame of your anim brush.
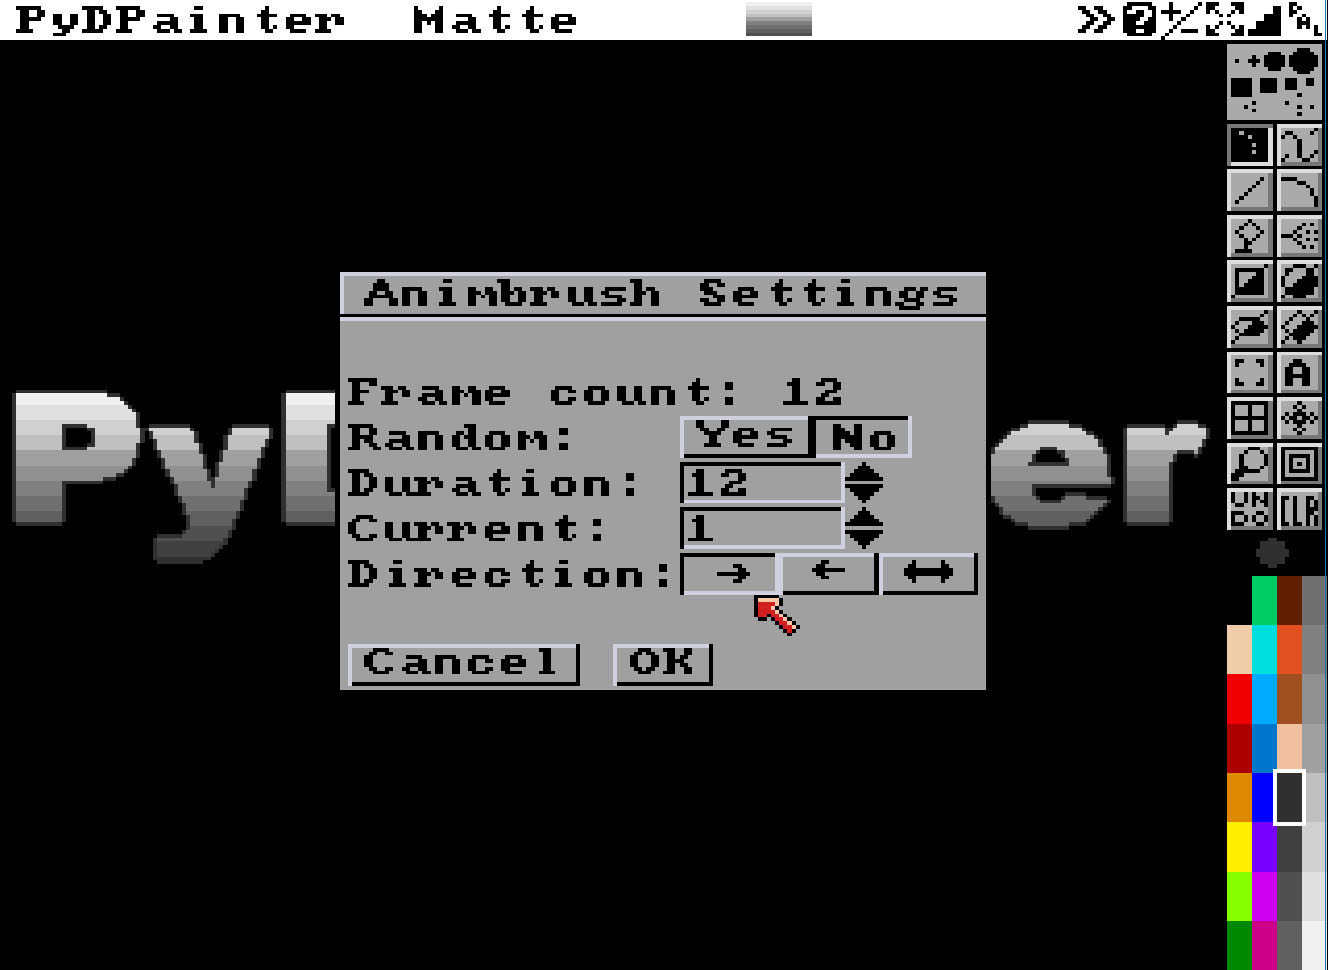
Current: must be "1".
Check in the animation bar at the bottom that you are starting from the first animation frame: 1/15.
Use Dot tool: (the first tool in the toolbar)
Position yourself precisely at the top right-hand corner of a letter like the D in the example. Click once without shaking. This drops a frame of the star animation onto the current frame of the animation. Use the PageDown key to move to the next frame. Click again (avoid moving the pointer, stay in place at the corner of the letter). Repeat the operation 12 time.
There are 3 frames left without a star at the end, so it's normal to have a short break. Click on "play" icon at the bottom to play the animation and see the result.
Happy with the results? We're going to add more stars. But to vary the stars so that they don't all twinkle exactly the same, we're going to stagger them in time.
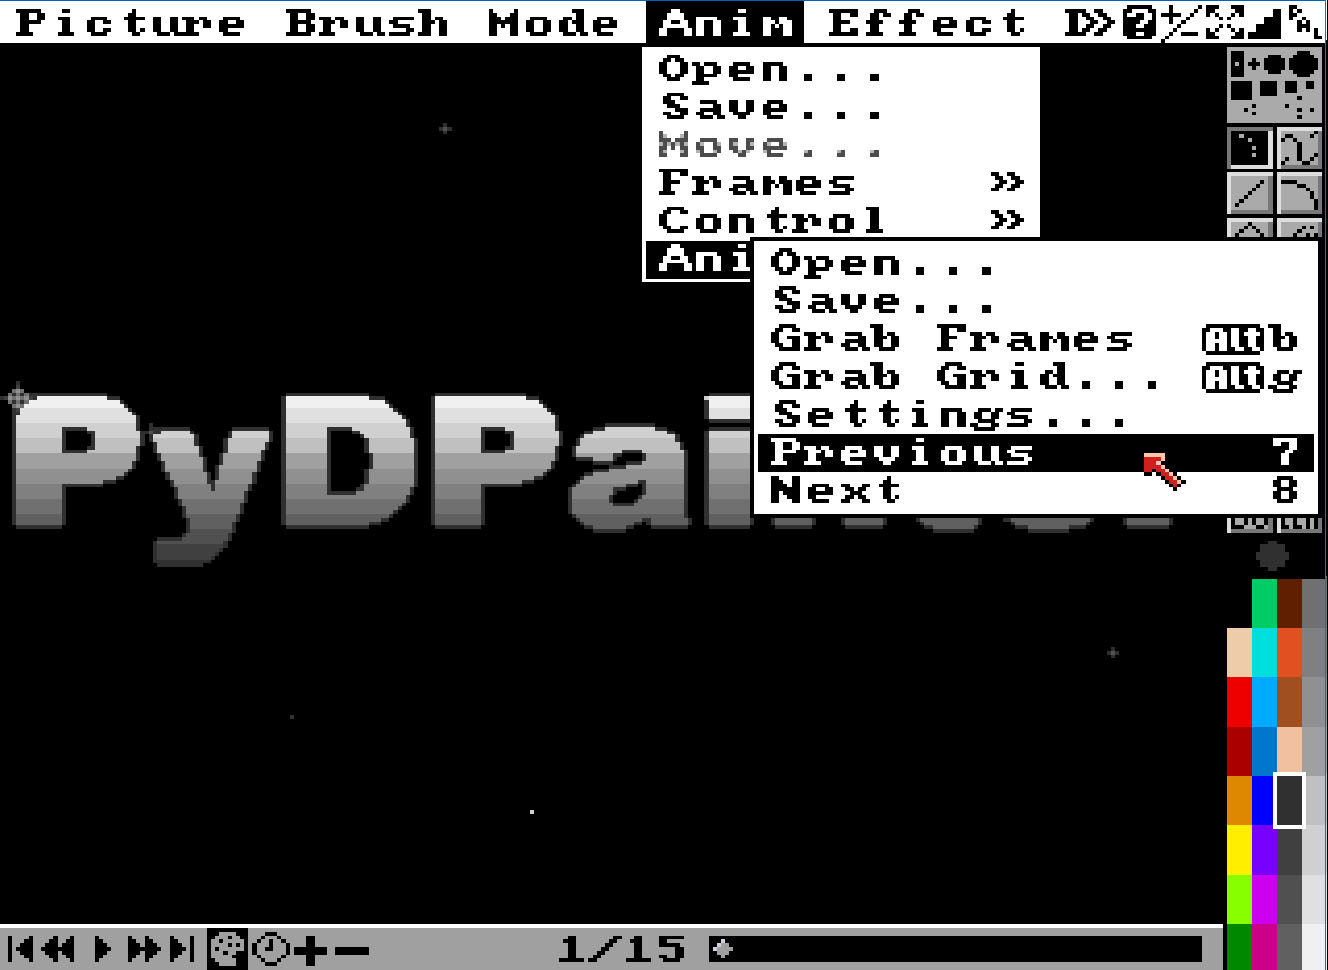
To do this, you need to start from another frame. Either changing frames with the slider on the bottom animation bar, or at the anim brush level, using Previous / Next from the Anim Brush menu or shortcuts 7 or 8.
Try dropping another star animation!
Now, to save yourself the trouble of hitting PageDown 12 times, you can use anim painting.
Place yourself :
PageUp/PageDown)7/8 to come back to a single white dot)Hold down the anim painting key (Windows key or left-cmd on Mac), then click twelve times. This drew the star in "motion" over 12 frames. If the Windows menu pops up at the end, press Esc to dismiss it and go back to PyDPainter.
All you have to do is experiment and learn to master it !
To fine-tune animation speed, use the clock icon "Set Anim Rate" on the animation toolbar below or Anim/Control/Set Rate... menu.

Lower the FPS value. A speed between 10 and 20 frame per second is sufficient. Then Click All Frame or Update and OK.
You can save this animation (the whole screen) using the Anim/Save... menu. It can be saved in Animated GIF format for greater convenience on this modern world. Legacy formats like Amiga ANIM5 are available too. Anim brushes must be saved separately in their own menu Anim / Anim Brush / Save....
Experiment and have fun!